Microsoft Project Tutorial – Part 11 – Linking projects, using resource pools, sharing resources and dividing projects into sub projects
Microsoft Project Server is the enterprise solution for this problem, but if you don’t have that and just want to divide your projects into separate files and see which resources are over allocated, this can be accomplished during the ordinary Microsoft Project application. But it’s a solution if you’re a single project manager: if you are many project managers you will probably need Project Server. The reason is that only one person can have write privileges to a Microsoft Project file at the time and if you’re using a Resource Pool in the standard version, all Project files will be locked if someone is editing his project.
But if you just want to work on your own, here is what you do.
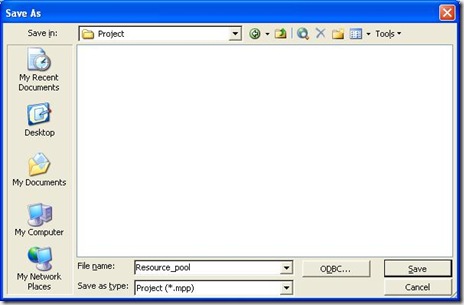
You start by creating the Resource pool. This is the file where you add all your resources and where you make edits to calendars. A resource pool is just an ordinary Microsoft Project file but you might want to give it a good name like Resource pool.
Then you add all the resources and change the default calendar and all the resources’s calendars. This is covered in earlier parts of this tutorial, but you can find the resource list in View—>Resource Sheet.
Be sure to save. And now you have a resource pool!
When you want to use the resource pool, you create a new project file and save it. You should make all the changes to the settings you normally do on project files: the only thing you don’t have to do is add the resources.
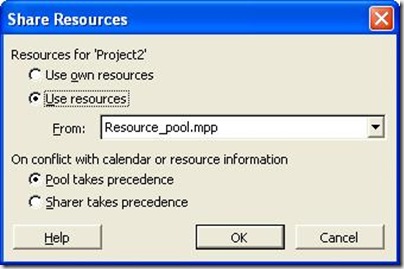
Before you start assigning resources, you need to open the Resource pool file. Then you make sure that the new project is active and then you select Tools—>Share resources. Select Use Resources and the Resource pool in the combo. Confirm by clicking OK.
If you view the Resource sheet in your new project, you can now see the resources from the resource pool, and you can start assigning resources, for example.
This can be done again for multiple projects and in this example, I’ve created yet another project file with the tasks and assignments below (observe that I used the resource pool for both Project files.
If you make any saves when you’re using a resource pool, the dialog box will look slightly different. You will be prompted to save all connected files. And if you have two files connected to a resource pool, you will have opened all three files, which mean that saving affects all three projects. Now you can imagine the problem if you are two project managers…
If you activate the Resource pool, for example using the Window menu, you can see that eventual over allocations are visible in Resource list:
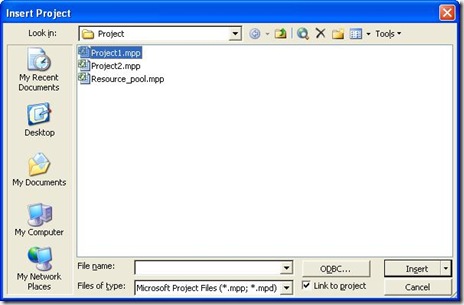
But if you open the Gantt chart, the task list is empty. Most of the time, you want to see all the projects in the Resource pool, so what you do is that you select Insert—>Project:
Select the Project file and confirm with OK.
Now you can see the Project in the Task list and if you expand the Project you can see the individual tasks:
Take a look at the ID column: there are two ID 1. The reason is that the first 1 is row nr 1 in the Resource pool and the second 1 is the first row in the Project file Project1. Confusing…. There is a column for Project so you can see to which project a task belong. And this is important if you have many inserted projects.
Before you add another project, be sure to collapse the current projects, otherwise there is a risk that you insert the new project in the already inserted project…
When you’ve inserted a number of projects, you can start working the file like you were just using a single project. You can insert or edit task, change assignment, etc. You can even make links between tasks in different projects:
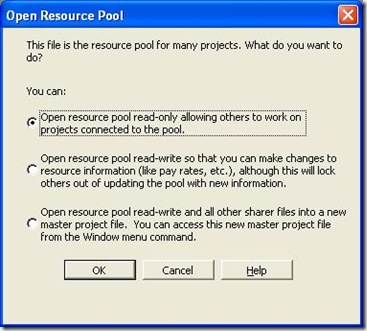
If you close everything and then try opening one of the files, you are prompted to specify which files you wish to open. Depending on if you’re opening the resource pool or one of the other projects, the texts might differ, but the important thing is to be able to save changes, you need to open all files.
In this case you should select the second option and confirm.
When you’re using links between tasks in different projects, you can see linked tasks from other projects. They have grey bars in the Gantt chart and if you open the Task Information dialog box, there are some other attributes.
If you work with multiple project files, remember that this means that you should not have the same task names in different files. If you for example have the task Project end in four projects, which one does an external task refer to? Yes, you can view the Project column, but it’s much easier to select better task names.


Concise and clear article. Thanks.
Thanks for the great idea it help me alot, but my problem is Resource Duplication. When I make a Master Project Plan and have 3 sub projects in it, and all sub project resources also copy in a resource sheet of Master Project Plan, how do i remove this duplication and assign a single Resource to all sub projects. please help me out from this
When you’re including a sub project, remember to collapse all hierarchies, especially when you already have sub projects. otherwise you might include a sub project in another sub project